Surya Namaskar or Sun Salutations is a sequence of Yoga poses. When performed correctly, it aids great amount of Body, good amount of Mind, and optionally, some amount of Spiritual Well Being. This is a pictorial presentation on how to perform Surya Namaskar. Press the hands against each other tightly. The thumbs are together and are made to press into the chest.
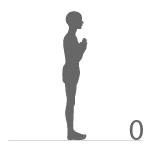 Namaskaarasana
Posture 0: Breathe normally.
Namaskaarasana: Hands in a namaskar posture, with thumbs of hands pressing hard into the chest. The lower part of the hands should be parallel to the earth. This is a good exercise to practice how to stand properly. The weight of the body is equally distributed to both the feet. The sagging stomach muscles are pulled in and supported by the upper body. Hence a good exercise for the stomach muscles.
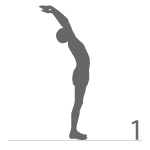 Urdhva namaskaarasana
Posture 1: Inhale.
Urdhva namaskaarasana: Palms of both hands are joined, and slowly pulled up with the hands ending up to the sides of the ears,the body is bent backwards, with eyes looking towards the hands. If you cannot hold palms together, open them but tie the palms with the thumb fingers. This activates the front portion of the body from toes to forehead. This posture is very good for upper and lower back. Hip muscles become stronger, the chest becomes wider. Blood circulation increases to the head and hands.
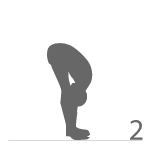 Adharaasana
Posture 2: Exhale.
Adharaasana or Uttanaasana: The body is bent down, with hands stretched down to touch the ground. Ideally the entire palm is supposed to rest on the ground, with the head touching the knee bones. This activates the back of the body from heels to head. This is good on the stomach muscles, arms and knee muscles.
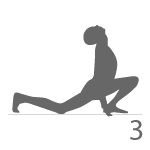 Eka paada prasarana aasana
Posture 3: Inhale.
Eka paada prasarana aasana (One leg behind): One leg goes behind and body gets lowered. The two palms will be resting on the ground, the knee of the leg which goes behind touches the ground. The head looks up. Complete exercise to both the legs, lower back and chest.
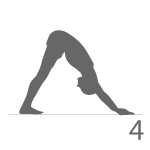 Chaturanga Dandaasana
Posture 4: Exhale.
Dwi paada prasarana aasana or chaturanga Dandaasana (Both legs behind): Second leg joins the first leg with both feet joined (press them to one another), body in a inclined plane. In this posture, only the two hands (palms) and the fingers of the legs touch the ground. The head of the body should be at a higher plane and the legs will be in a downward slope. The head will be looking straight and focus the eyes to 10 feet in front of the body. Remain in this posture for 15 seconds. Stretches the complete body thus activating the blood circulation.
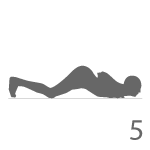 Ashtaanga namaskaraasana
Posture 5: Exhale and hold.
Ashtaanga namaskaraasana: The body is lowered to touch the ground at the forehead, chest and the knees. The rest of the body will be up in the air supported by the forehead, chest and knee. Remain in this posture for 5 seconds. Exercises the back, shoulder and chest muscles.
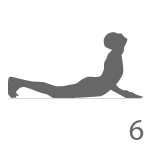 Urdhva mukha shavanaasana
Posture 6: Inhale.
Bhujangaasana or Urdhva mukha shavanaasana: From posture 5, pull the body forward with the hands (palms) on the ground and feet touching the ground. The body should be in a curved towards the ground. Excellent for the lower back, shoulders, neck, chest and abdomen. Wrists also get their share.
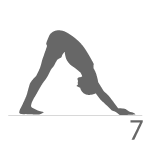 Adho mukha shavanaasana
Posture 7: Exhale.
Adho mukha shavanaasana: Pull the body inward, with palms and feet firmly on the ground. Press the feet so that, the heels touch the ground. Don’t bend the knees. Extend the spinal–cord to the maximum. Pull the stomach in. Expand the chest, while pushing the shoulders back. While pushing the head in, try touching the chin to the chest. The body will look like a hill, pointing up towards the sky. Good for feet, calf muscles, thighs, hips, back and neck. Energizes the limbs – best for athletes.


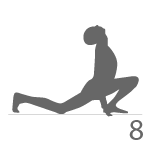 Eka paada prasarana aasana
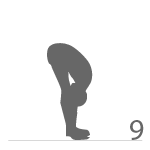 Adharaasana or Uttanaasana
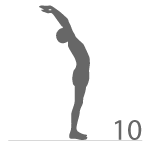 Urdhva namaskaarasana
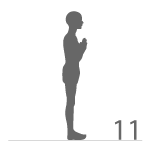 Namaskaaraasana


